السلام عليكم ورحمة الله وبركاته
صناعة الأضواء في برامج التصميم الإعلاني هي أشياء قد يفسرها البعض على انها نوعاً ما صعبة ولكن هي سهلة بدرسنا هذا ولكن ساطلب منكم ان تتخذوا منها دروس من جانبين في الإنكليزية وفي التصميم الإعلاني في الفوتوشوب ولكن انتم على علم باننا نفضل أن يكون الفرد ملم بما هي العلوم التي من حوله ولكن بتقريبها من ثقافته وتاريخه ليرقى بهما في هذا الركب السائر بشكل سريع بعلوم كثيرة وواسعة المهم ساترككم مع الدرس عن كيفية صناعة هذه الاضواء من الالوان وتطبيق المؤثرات عليها
So in this tutorial I will show you how to create that effect. It's
a sort of monitor/halftone effect mixed with glows and other light
effects. We will play with Blend Modes and Blurs. The whole process is
quite simple and it won't take more than 20 minutes to achieve the same
result.
Step 1
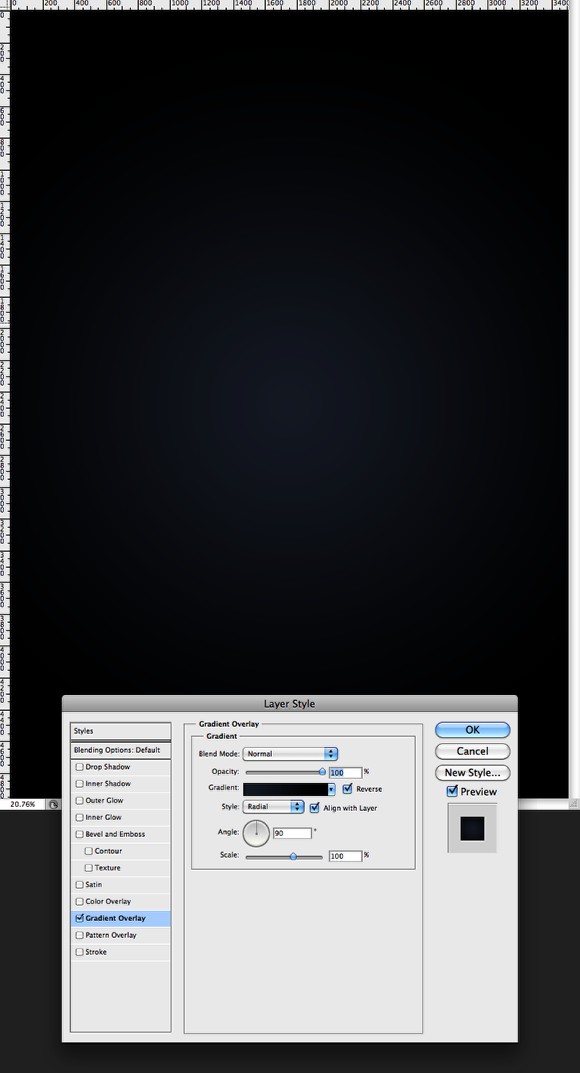
Open Photoshop and create a new document. I used
A4 for the size. Also
RGB colors. After that double click on the background layer and apply a
Layer Style to it. Use
Gradient Overlay. For the colors use
black and in the center a
dark blue. For the
Style use Radial.
 Step 2
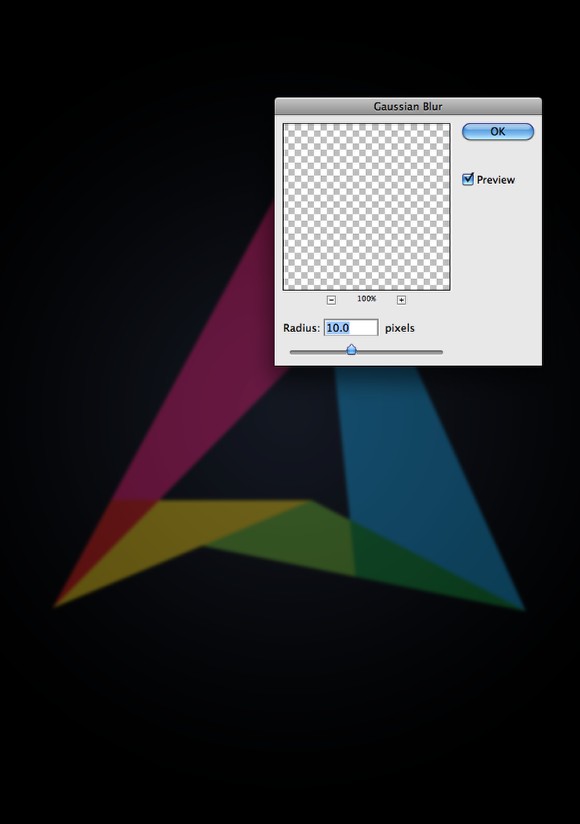
Import the vector object from Illustrator and paste it in the center of the document.
 Step 3
Duplicate the layer and go to
Filter>Blur>Gaussian Blur. Use
10 pixels for the Radius.
 Step 4
After the gaussian blur, go to
Layer>Layer Styles>Inner Shadow. Change the
Blend Mode to Color Dodge, use
white for the color and 40% for the Opacity. For the
Angle use 90º. For the
Distance use 91 pixels, for the
Choke use 0 and for the
Size use 3 pixels.
 Step 5
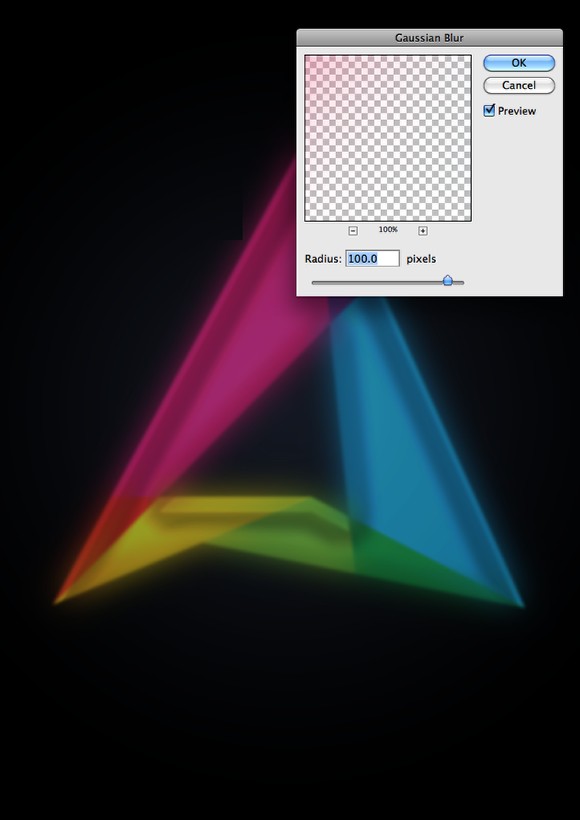
With the duplicated layer, duplicate it again because we will need
another layer with the symbol for the effect. Then select one of the
and go to
Filter>Blur>Gaussian Blur. Use
100 pixels for the Radius. This layer will be on top of the other one with inner shadow.
 Step 6
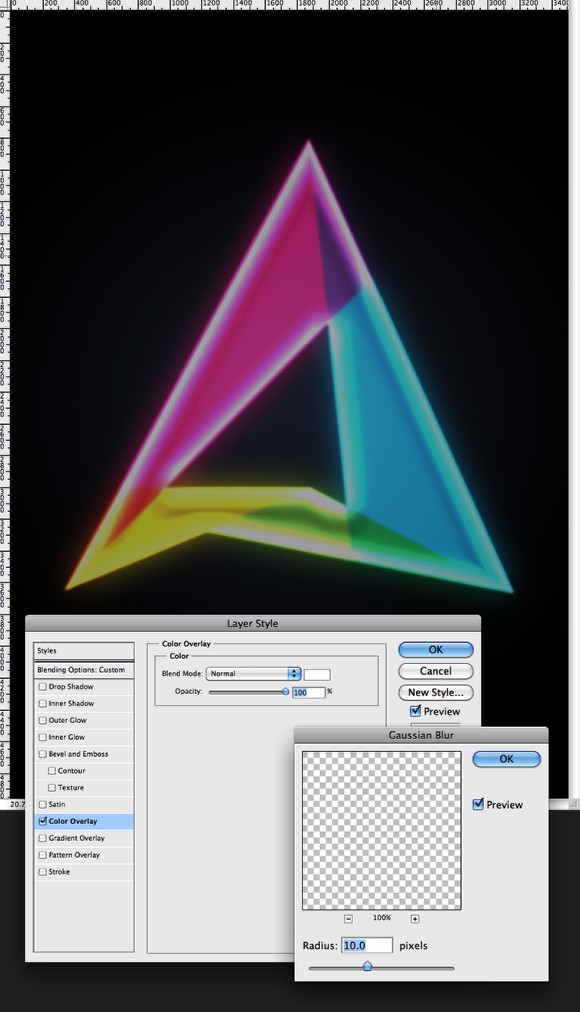
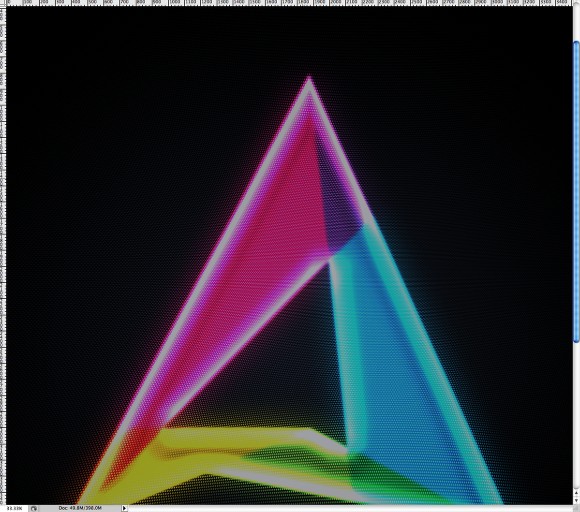
With the third copy of the symbol, select it and go to
Layer>Layer Style>Color Overlay. Use white for the color. Then go to
Filter>Blur>Gaussian Blur. Use
10 pixels for the Radius. After that with the layer selected go to
Layer>Group Layers. The layer will be inside a folder in the Layer Palette. Select the group and change the
Blend Mode to Color Dodge. You will have a really cool light effect like the image below.
 Step 7
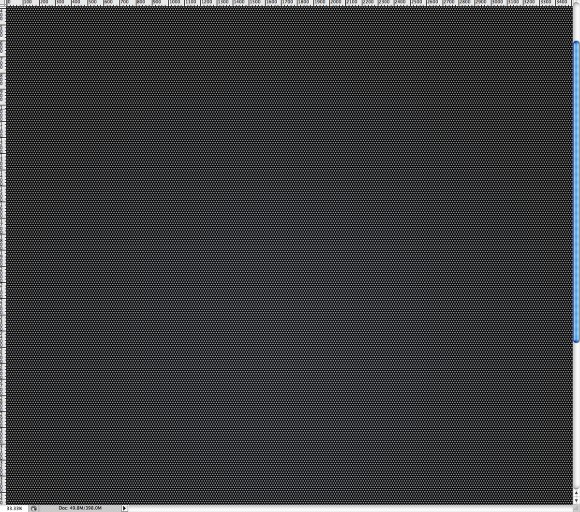
Add a layer on top of the other layers and select the
Paint Bucket Tool (G). Change the type from
Foreground to Pattern, then select a dotted pattern. You can As you can see the background is black and the dots are white.
 Step 8
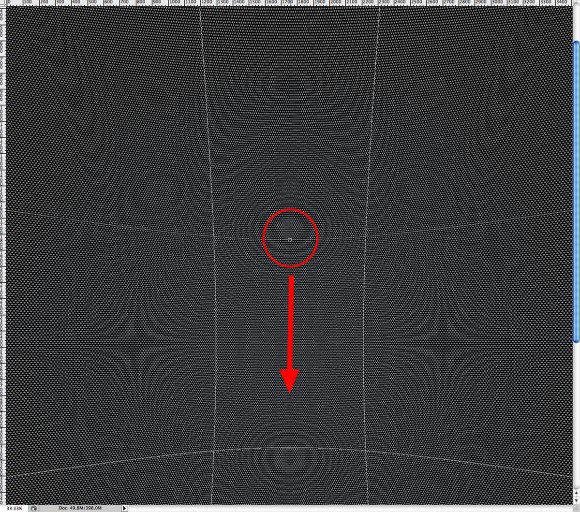
Go to
Edit>Transform>Warp. For the
Warp type select Fisheye. Then pull the little controller down to change the fisheye effect.
 Step 9
Change the
Blend Mode of the pattern layer to
Color Dodge and the glowing areas will have this sort of monitor, halftone effect.
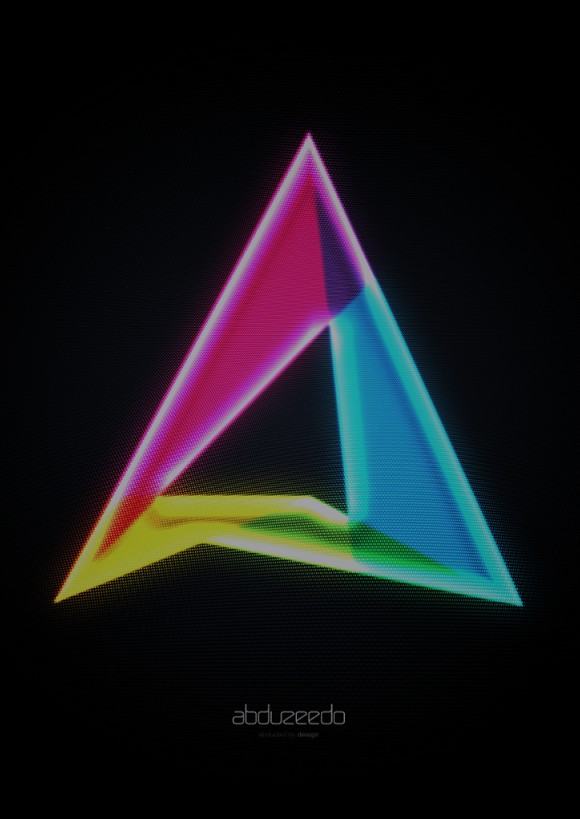
 Conclusion
This light effect it's pretty much the same effect I use to create
the Abduzeedo's logo effect. However I added a few Layer Styles to
increase the light effects, especially in the edges. As you could see
the whole process is pretty simple and it can be done in 20 minutes or
less. It's all about playing with the tool

 نرجو من الله ان نكون قد أفدناكم بمعلومات جديدة ومتميزة عن غيرها ولكم مني
ارق تحيه
اخوكم سمو الأمير